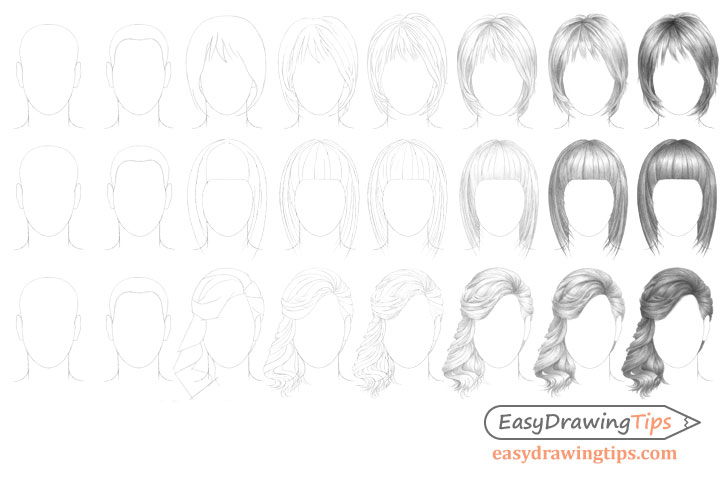
This tutorial shows how to draw female hair with three different hairstyle variations including natural looking, straight and curly pilus. Each style includes step by step cartoon examples and explanations.
If you are going to be follows this tutorial information technology'southward all-time to do so using pencil and paper.
Be sure to beginning drawing with very low-cal lines every bit you will need to erase parts of it in some of the steps. Calorie-free lines volition also brand it much easier to right mistakes. The lines in the examples have been made slightly darker just and then that they are easier to run across.
As well please note that regardless of which hairstyle you want to draw it's recommended that you read over the instructions for the first instance as it provides the most detailed explanations. The other styles have shortened instructions to avoid repetition.
How to Draw Natural Looking Hair Step past Footstep
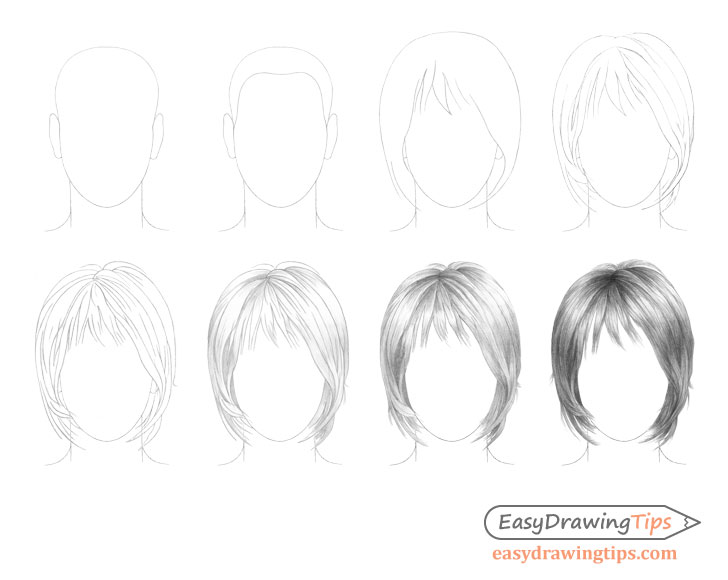
This first case shows how to draw fairly natural looking hair that's not too messy but at the same time does non look like information technology'south been neatly combed.
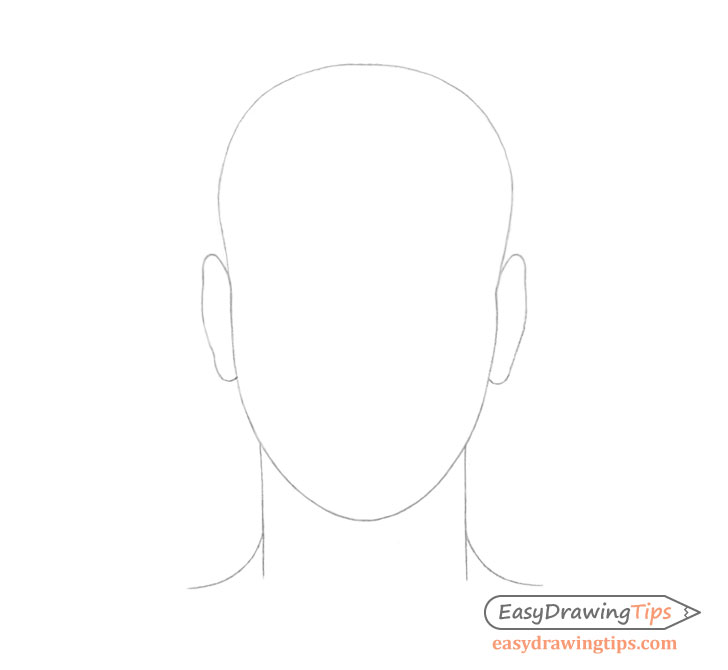
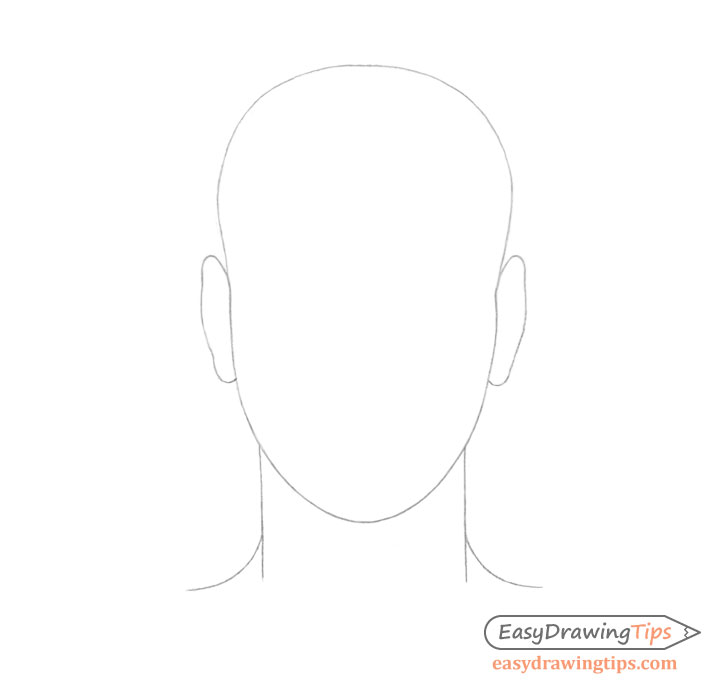
Pace one – Describe the Head

Begin the drawing by showtime outlining the entire shape of the head (including the ears). Doing so will help you amend estimate the book of the hair. Information technology tin can likewise assistance you avert making mistakes.
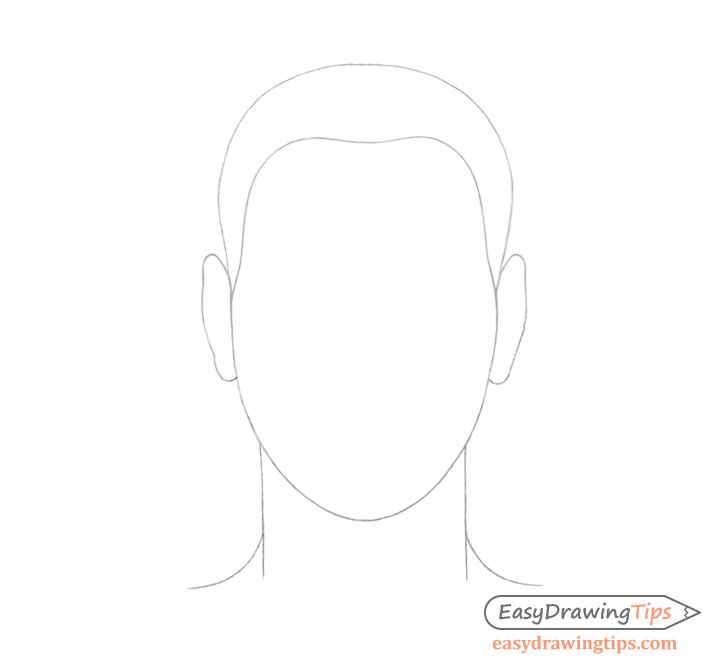
Step 2 – Draw the Hairline

Some distance grade the top of the head describe the hairline. This is over again to assistance avoid any potential mistakes like having openings between the various hair clumps that go too far up the head.
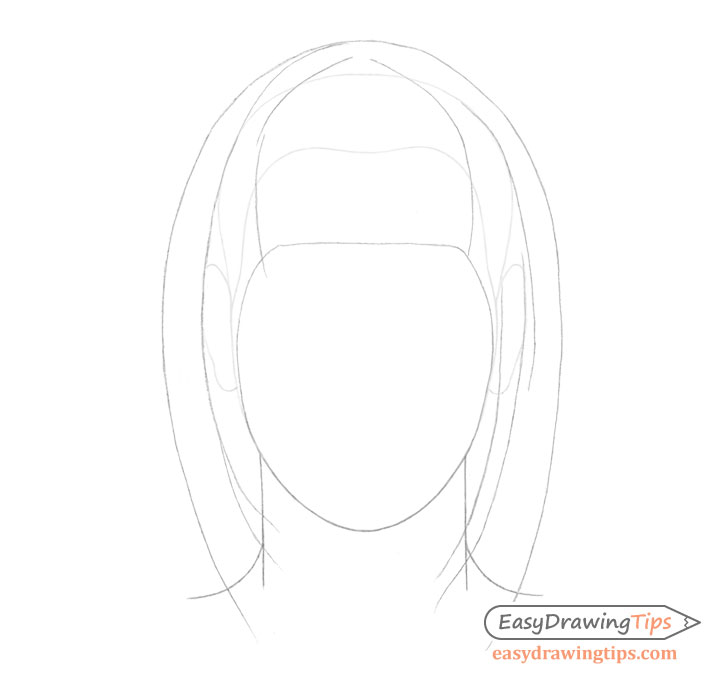
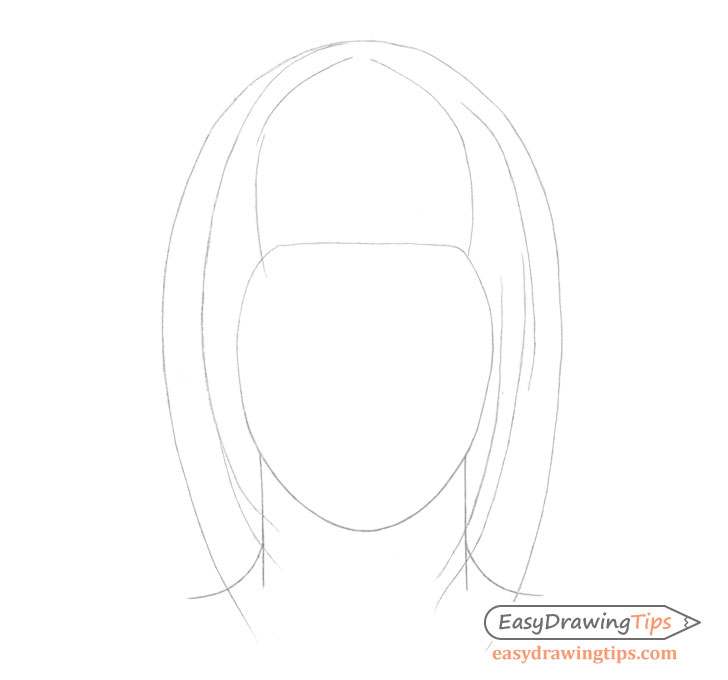
Step iii – Draw the Outline of the Pilus
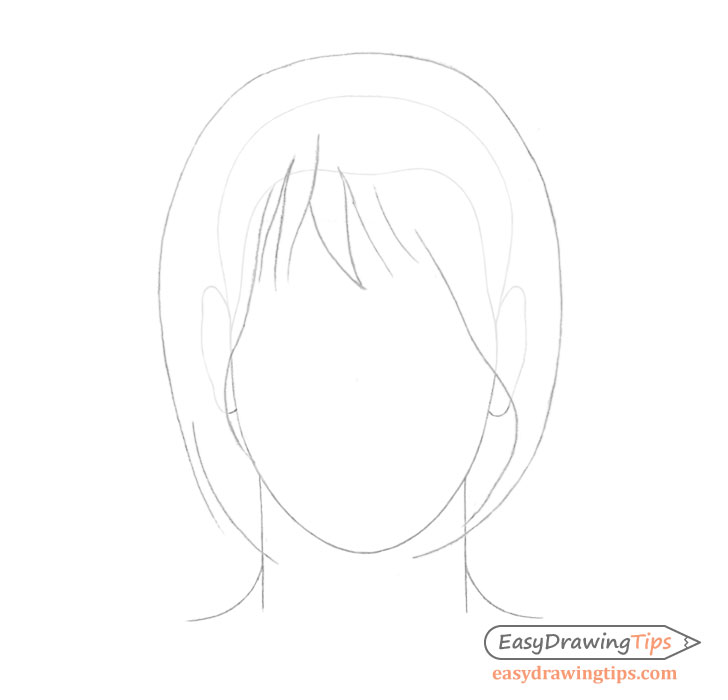
Over top of the drawing of the head add an outline of the main shape/shapes of the hair. At this stage don't worry virtually getting every small hair clump but instead focus on it's overall volume and large shapes that define the hairstyle.
Medium length hair as in this example will tend to"hug" the face. Meaning that it will curve towards the prc s it goes down.
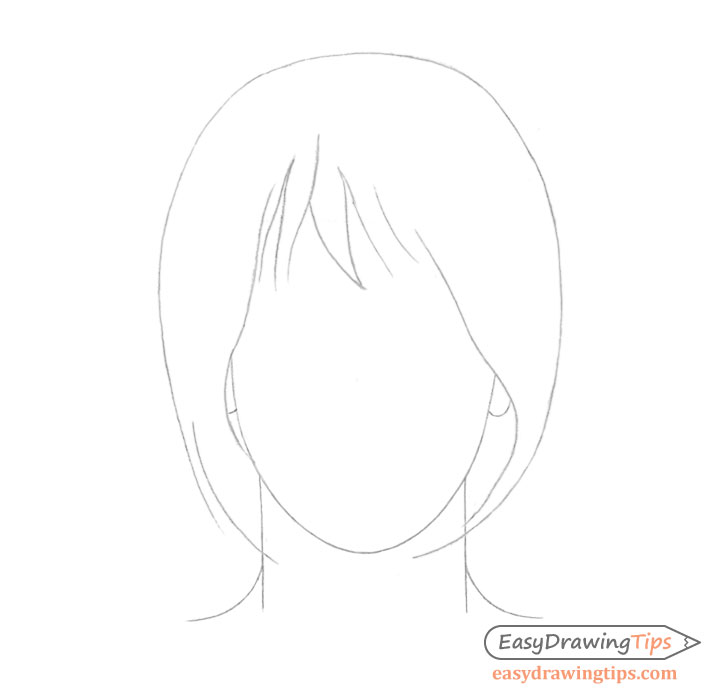
To avoid your drawing getting overly clutter erase the parts of the head covered by the hair after you are washed. You lot can also erase the hairline.
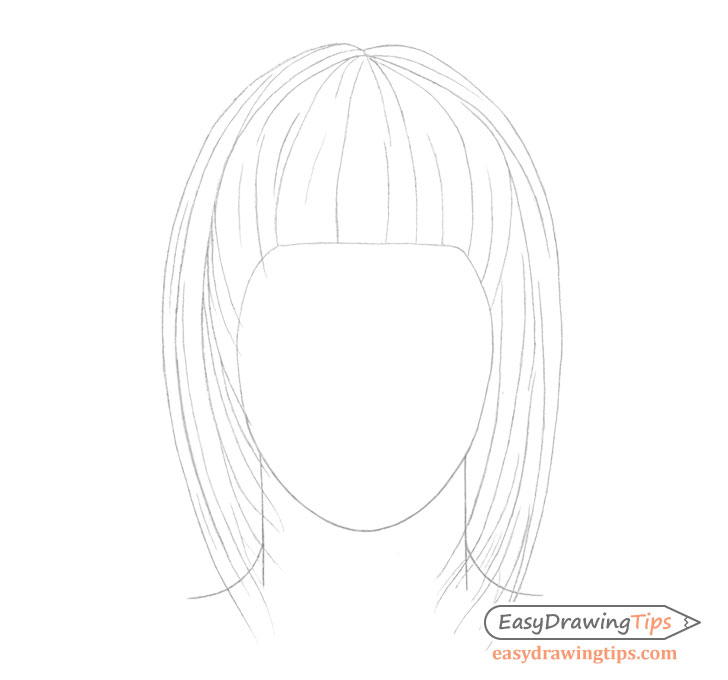
Footstep 4 – Add Some Details
Gradually add together in the smaller folds and clumps of the hair to amend define information technology's shape. Y'all can erase parts of the outline from the previous step where needed.
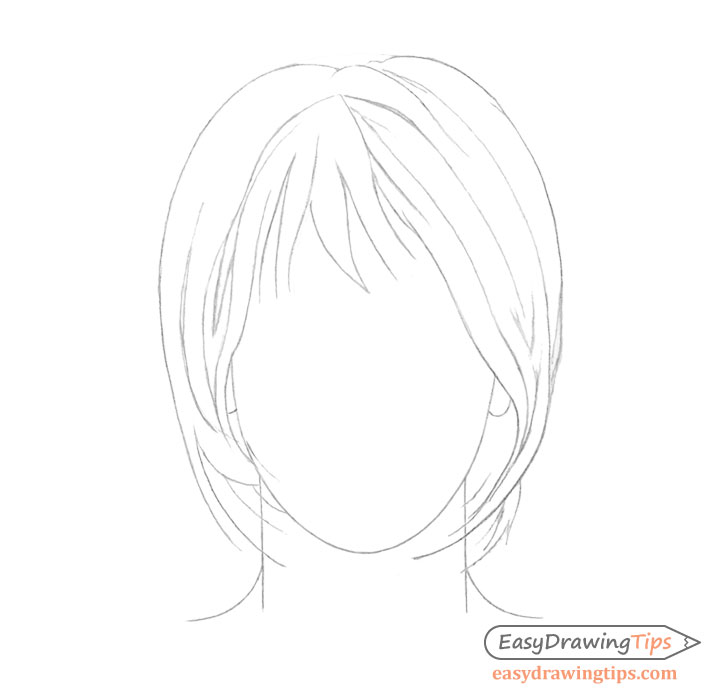
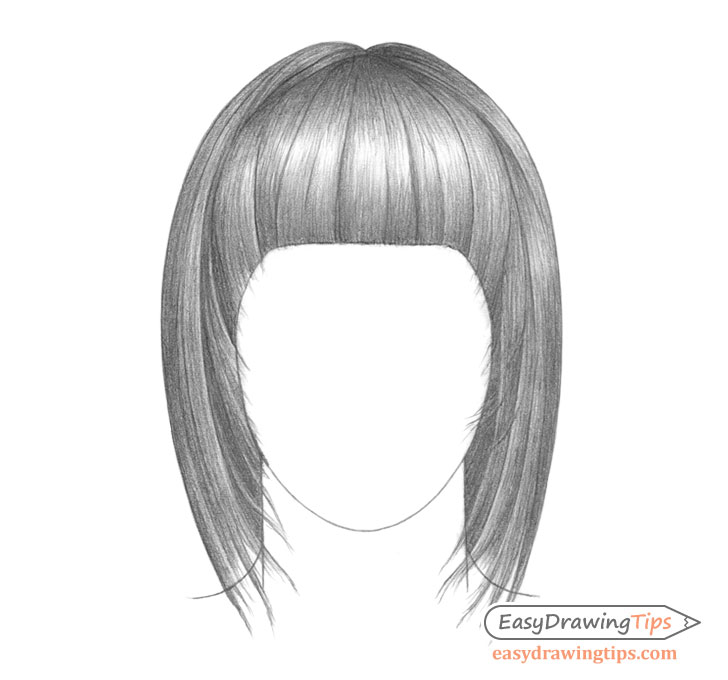
Footstep 5 – Finish the Line Drawing
You should somewhen have a line drawing with a adept amount of details similar to the example above.
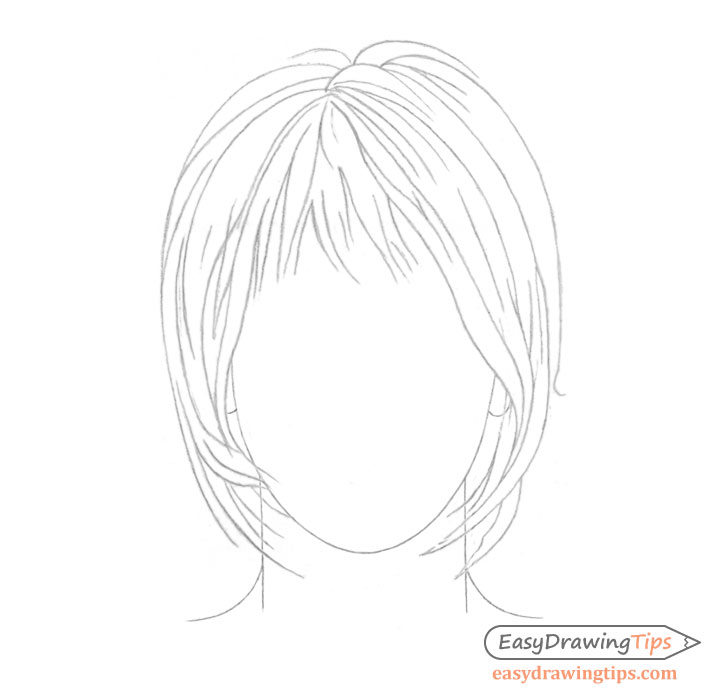
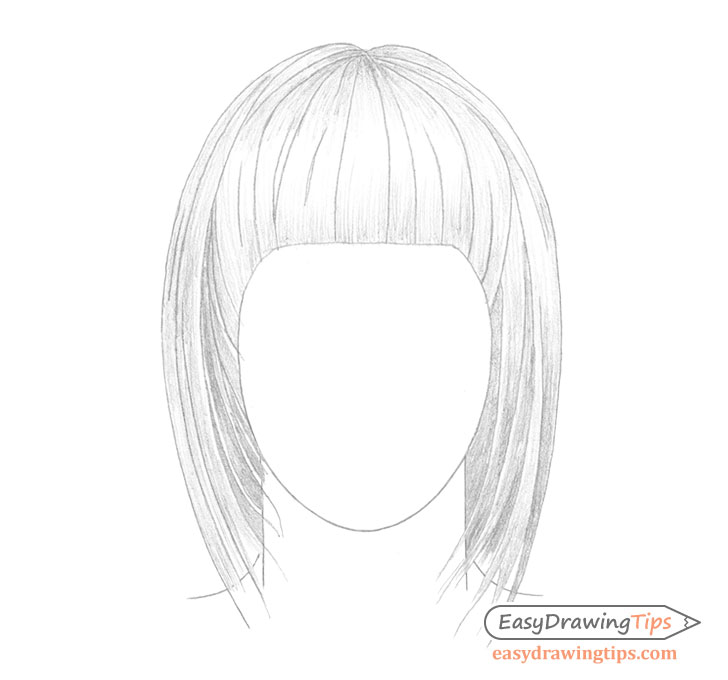
Step 6 – Begin Shading

All of the examples in this tutorial will employ adequately generic lighting with no peculiarly strong i directional light source.
The main goal of this step is to apply an initial layer of shading that will define the light, medium and dark areas of the hair.
Try and brand the shading strokes in a fashion where they flow along the different hair clumps and folds. Also effort and keep your strokes somewhat visible (don't blend them too much) to create an upshot of private hairs equally you shade.
Be careful not to press too hard on the pencil as you will want to gradually darken your shading to avoid mistakes such as making the mid tone areas (light grayness) too dark in relation to the shadows.
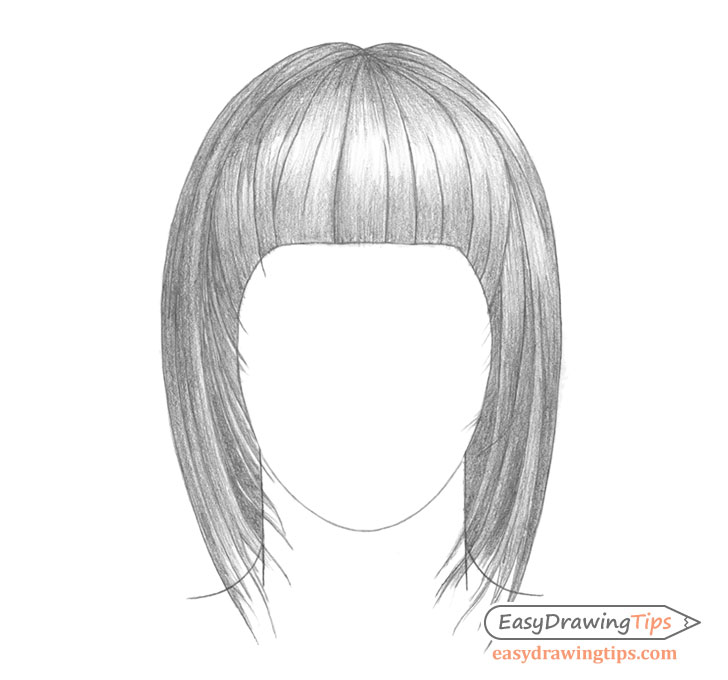
Stride vii – Intensify the Shading
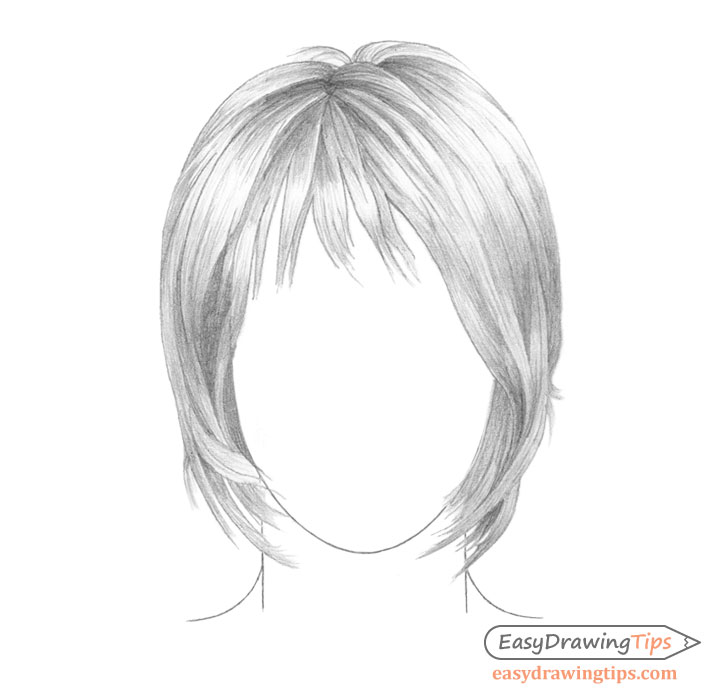
Refine the shading by creating smoother gradients between the mid tone, lite and "in shadow" areas of the hair. You can also make the shadow areas slightly darker.
Footstep 8 – Finish the Hair Drawing
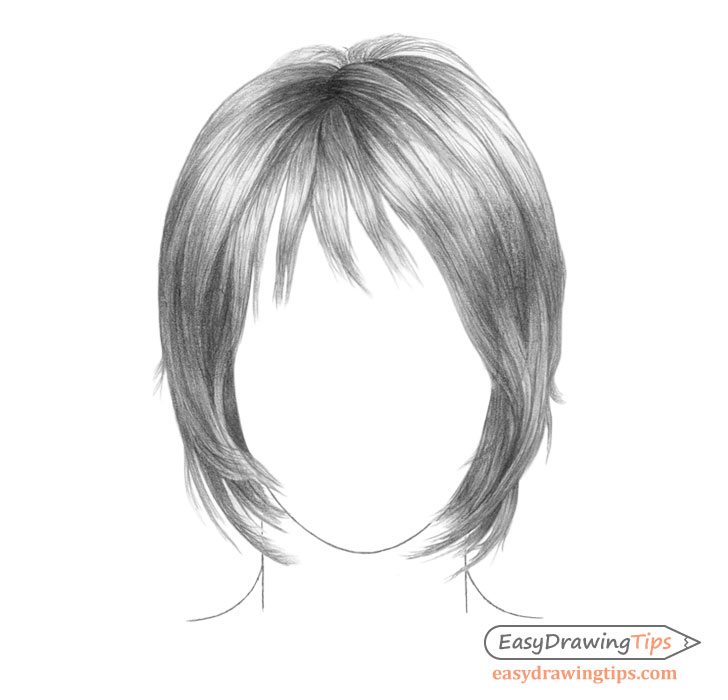
Gradually darken the overall drawing until y'all create a good balance between the various areas of the hair. Be certain to go on the strokes in the lite and mid tone ares visible by leaving some distance between them.
Once done you can make some quick pencil strokes on the tips of the various hair clumps to give an advent of individual hairs. Exercise this by starting time pressingly harder on the pencil and and then apace pulling it away from the paper. These can help give the hair a softer and more than natural look.
How to Draw Straight Pilus Footstep past Footstep
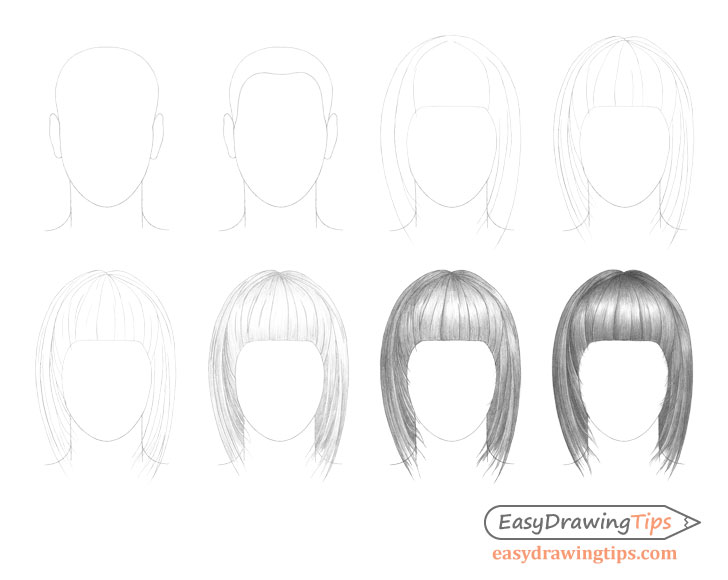
This example is of direct neatly combed pilus.
Step 1 – Draw the Head
Aforementioned as the previous case begin by making an outline drawing of the head.
Step 2 – Draw the Hairline
Again add in the hairline over top of the head cartoon.
Stride three – Describe the Outline of the Hair
Like to the first example begin by drawing the primary shape of the pilus with the largest details over elevation of the head/hairline.
Equally it'southward again medium length pilus you can draw it somewhat wrapping around the shape of the head but less so than the previous case.
Erase the parts of the head (including the hairline) that are hidden by the hair one time you are done drawing information technology'south basic shape.
Step 4 – Add Some Details

Add in some more of the details such every bit the larger splits and folds.
Step 5 – Cease the Line Cartoon
Finish the line cartoon by adding the smallest set of details.
Stride 6 – Brainstorm Shading
Similar to the showtime hairstyle begin past applying an initial serial of strokes that will ascertain the light, medium and nighttime areas of the hair. Again exist sure to make these in a way where they menses along the shape of the pilus. As this hairstyle is much more symmetrical so the starting time one it will tend to have much smoother transitions between these areas than the first example.
Step 7 – Intensify the Shading
Slowly darken the drawing by applying more layers of overlapping strokes. Exist certain to leave some space between them to create an effect of individual hairs. Although unlike the previous instance you lot can make them slightly less apparent to give the pilus a smoother and neater look.
Step viii – Finish the Straight Hair Drawing
Finish the drawing by further concealment and smoothing out the overall shading.
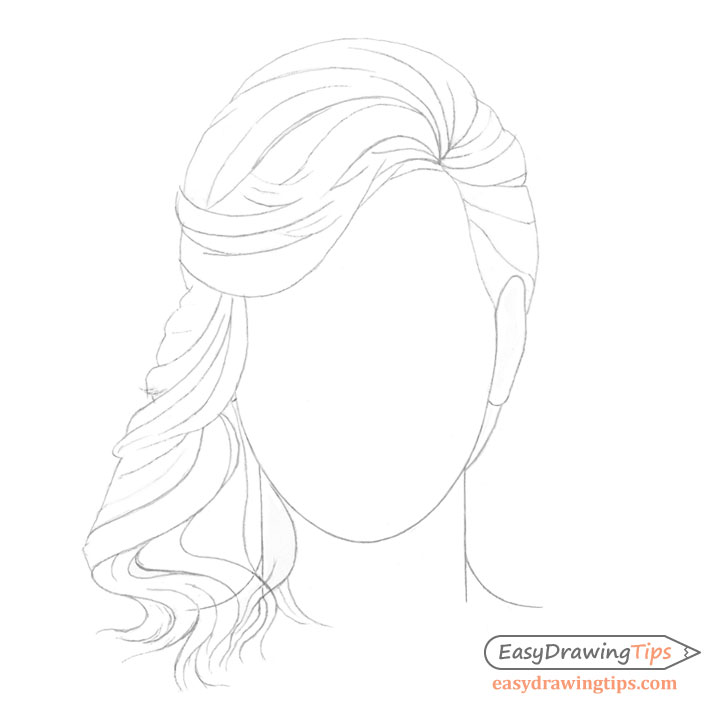
How to Draw Curly Pilus Step by Stride
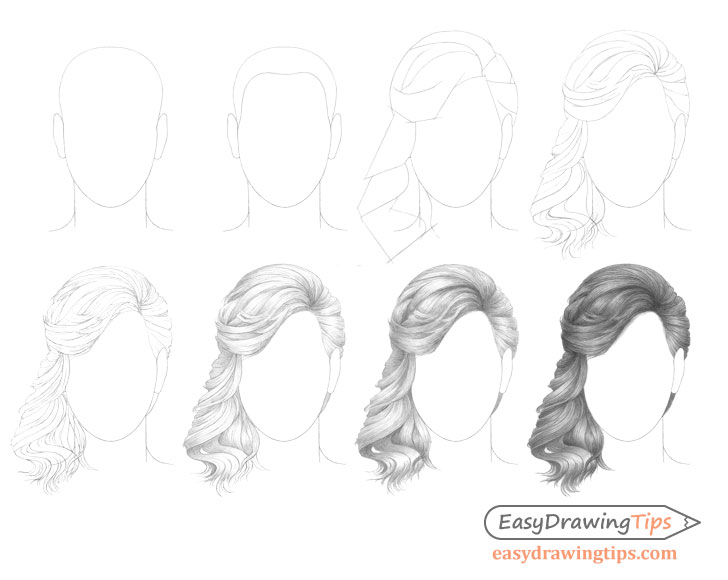
This last example is of medium long curly hair. It's as well probably the almost complex.
Pace 1 – Draw the Head
Same every bit the other example begin by drawing an outline of the entire shape of the head.
Step 2 – Depict the Hairline

Onto the head add the hairline.
Step three – Draw the Outline of the Hair

Over peak of the drawing of the head and hairline outline the main shape/shapes of the hair.
In this detail example that may be a footling scrap more difficult due to the various folds curly hair tends to take. To make things easier you can use construction lines as shown in the above example to sort of "frame" these shapes.
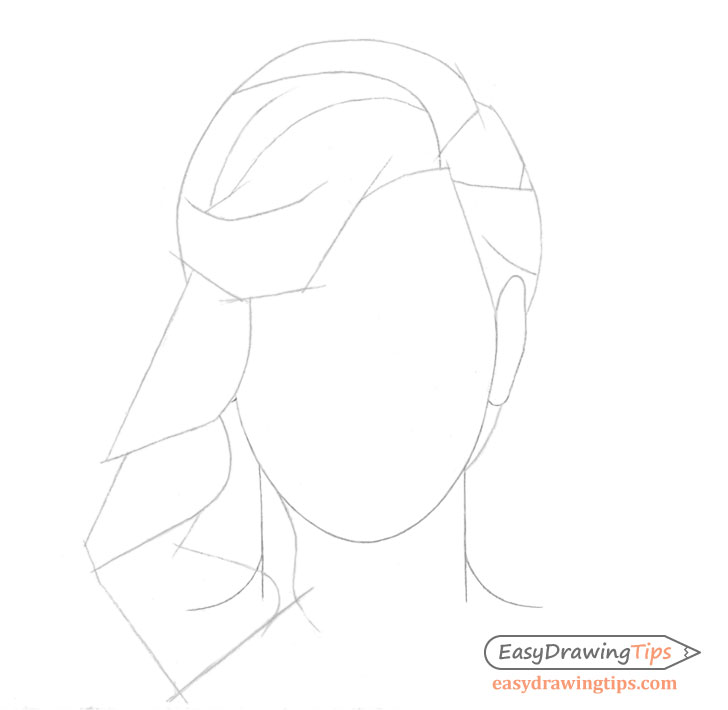
Erase the hairline and parts of the head covered past the hair once done.
Step 4 – Add together Some Details
Inside the structure frame from the previous step begin cartoon in some of the more than organic shapes and folds of the hair. You lot tin erase the construction lines every bit you go through them.
Footstep 5 – Stop the Line Cartoon
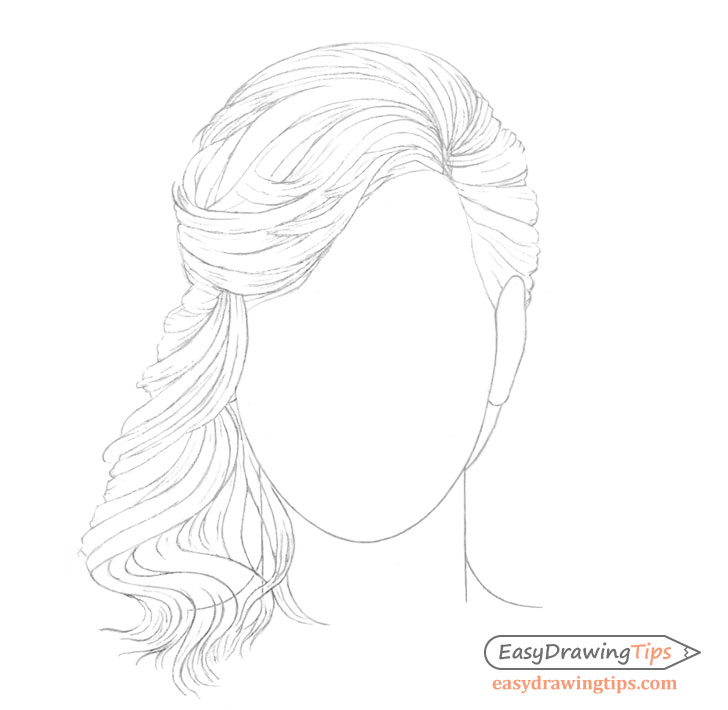
Add in the smallest sets of pilus splits, folds and clumps to finish the line drawing.
Pace 6 – Begin Shading
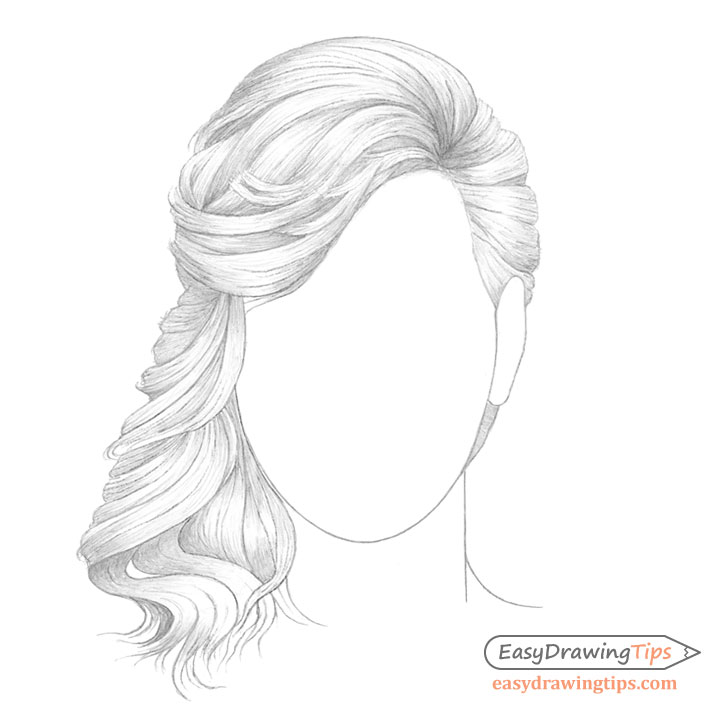
Once again as in the two previous examples apply an initial layer of strokes the ascertain the low-cal, medium and dark areas of the hair.
Due to it'southward various curves and folds curly hair volition tend to have a much more than random distribution of these.
Step 7 – Intensify the Shading
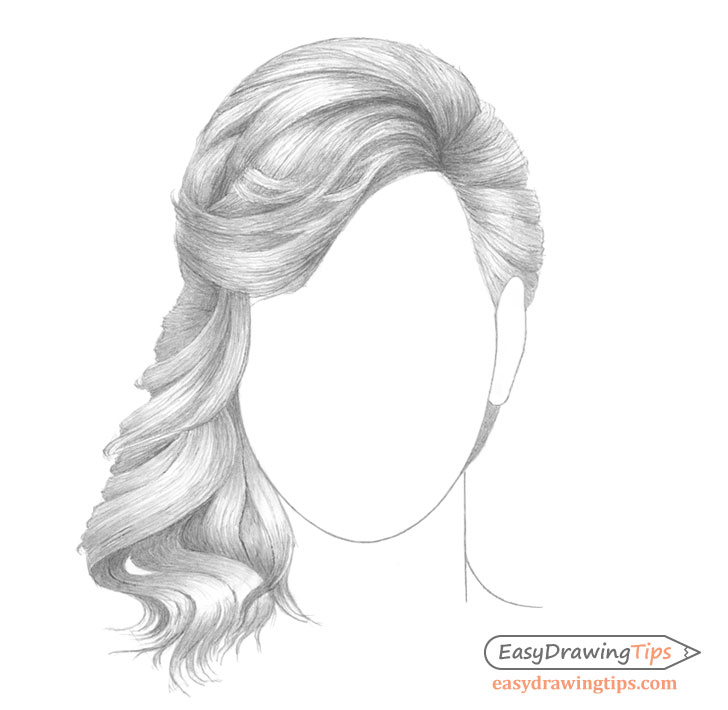
Add together more layers of strokes over top of the first one to smooth out the gradients and darken the overall shading. Once more be sure to leave some distance between the strokes to requite an effect of individual hairs.
Step 8 – Finish the Curly Hair Drawing
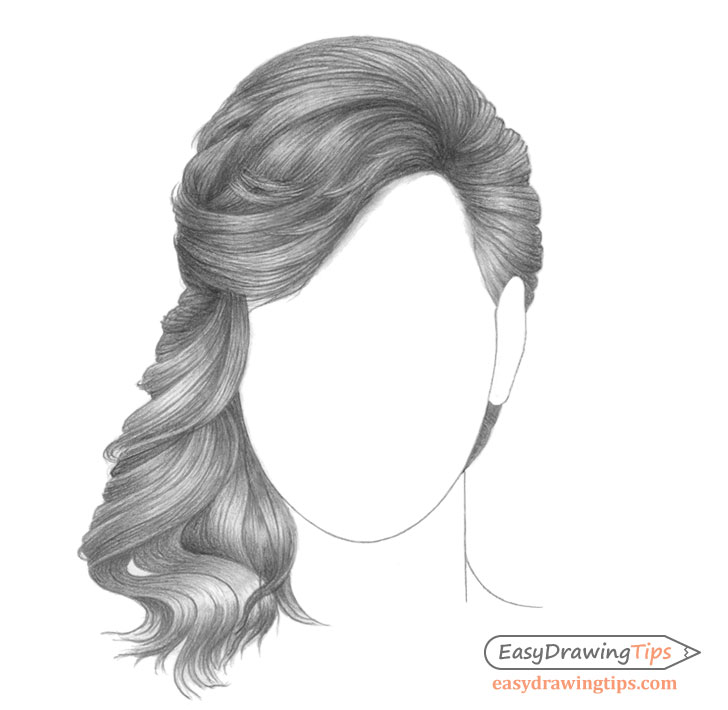
Go on applying more layers of strokes smoothing out the gradients and further concealment the overall shading until you terminate the drawing. Y'all can also draw some fairly dark wavy lines into the shading to further emphasize the various hair strands that tend to be more visible in curly hair.
Conclusion
The examples in this tutorial can give y'all a good basic idea of how to draw some common pilus types. If yous want to effort drawing another hairstyle you tin can even so employ the same steps/principals used in these tutorial. First defining the main shape of the hair and and so refine your cartoon by adding the smaller details. Afterwards y'all tin gradually shade the line drawing in several lairs of strokes.
For example of cartoon male hair meet:
How to Draw Male person Hair Step past Step
For the proportions of a female confront meet:
How to Draw a Female person Confront Footstep past Pace Tutorial
DOWNLOAD HERE
How to Draw a Girl Hair Easy TUTORIAL
Posted by: nancywinget.blogspot.com


Comments
Post a Comment